Dolby Encoding Engine (DEE) is the newest application for encoding Dolby Audio Content and Dolby Vision . In the past, a proper encoder for E-AC3 was only available on Mac . Now that Dolby's present day encoder is available on Windows, we can all encode its codecs easily . This guide will show you how to setup DEE along with DEEW which is a simplified command line wrapper for DEE to make our work easier .
${tocify}
Who is this guide for ?
=> A video encoder who wants to encode their audio to any Dolby codec , specially to Dolby Digital Plus (DDP) aka E-AC3
This guide will include :
▣ How to install DEE along with DEEW▣ DEEW command examples
Instructions
1) DEE Installation :
a . Install VCRedist if it's absent in your system . Heres an AIO pack link .
b . Download DEE with crack . Here's an antivirus scanned Gdrive link . You can also download it from Rutracker which is the original source of that file .
c . After extracting, look for 'dolby_encoding_engine_install.exe' and open it . Follow through the agreement prompt .
d . After that the installer will ask you where to install DEE . You should do this step according to your own liking. For this guide I'll create a folder inside 'C:\' named 'Encoders' and create a subfolder named 'DEE' . So the folder location should be "C:\Encoders\DEE" . Input this location on the prompt and press ENTER . Now it should get installed successfully .
e . Copy all the files from the crack folder and place them to your DEE installation folder like you install a common cracked game . Now DEE.exe should be functional .
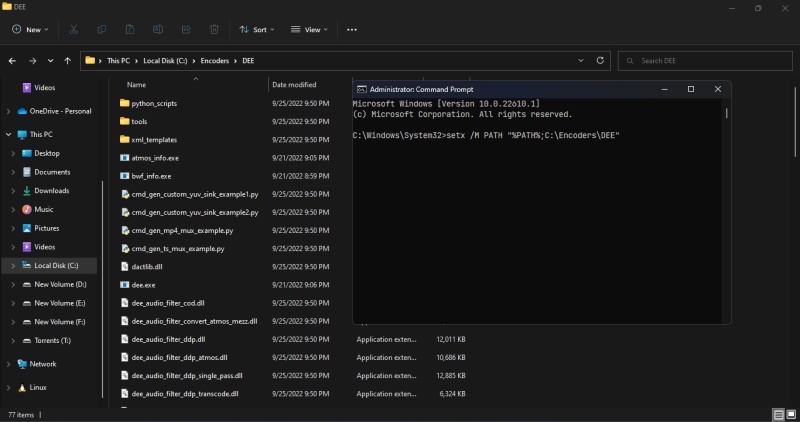
f . Lets add the DEE.exe folder to our system PATH variables , which will help the command line wrapper to work with ease . Launch the command prompt as Admin . Enter the command like this :
Quote:
For this guide the command will be like this:
| setx /M PATH "%PATH%;<Installed DEE.exe folder location>" |
For this guide the command will be like this:
Quote:
| setx /M PATH "%PATH%;C:\Encoders\DEE" |
Screenshot example :

f . Now our DEE.exe should be accessible from everywhere in the terminal . Lets double check . Open a new command prompt window and enter : "dee -h" . If theres no error then continue to the next step .
2) ffmpeg Setup :
DEEW uses ffmpeg to parse the input audio to RF64 format which DEE supports and more .a . Download ffmpeg . Extract the file to your chosen folder . In this guide I'll create a folder inside "C:\Encoders" named 'ffmpeg" .
b . After unzipping , go to the bin folder where ffmpeg.exe and ffprobe.exe is present . Copy the folder location and add that location to PATH like you've done with the DEE folder . Make sure you open the Command Prompt as Admin . For this guide the command will be like this :
Quote:
| setx /M PATH "%PATH%;C:\Encoders\ffmpeg\bin" |
Now, open a new command prompt window and enter : "ffmpeg -h" to check if its been done properly . If theres no error then move to the next step .
3) DEEW Setup :
DEEW is a simplified cli for DEE which makes our work pretty easy . DEEW can be installed in 2 ways . Through Python or A standalone exe . If you don't have python installed on your system go with the exe method . They are basically same .
Standalone exe:
Download the exe file and add it to PATH like you did before with DEE and ffmpeg . In this guide , I'll just move deew.exe to "C:\Encoders\DEE" folder which I have already added on PATH . Now deew should be functional in the system . After that it should be functional in your system . Now , open a new command prompt window and enter : "deew -c" to check if its been installed .
Python :
If you have python installed on your system , you can install it through pypi as well . Open your Command Prompt as Admin and execute the following command:
Quote:
| pip install deew |
After that it should be functional in your system . Now , open a new command prompt window and enter : "deew -c" to check if its been installed .
4) Usage :
If you have followed the installation steps correctly DEEW should be functional in your terminal . In this guide I'll use the command prompt for simplicity . You may use your preferred terminal . Now lets see the easiest way to encode an audio using DEEW .
Basic use :
Go to the folder which has your audio source file --> Type "cmd" on the address bar and press Enter --> Input the command like this :
Quote:
| deew -i "audio file name" |
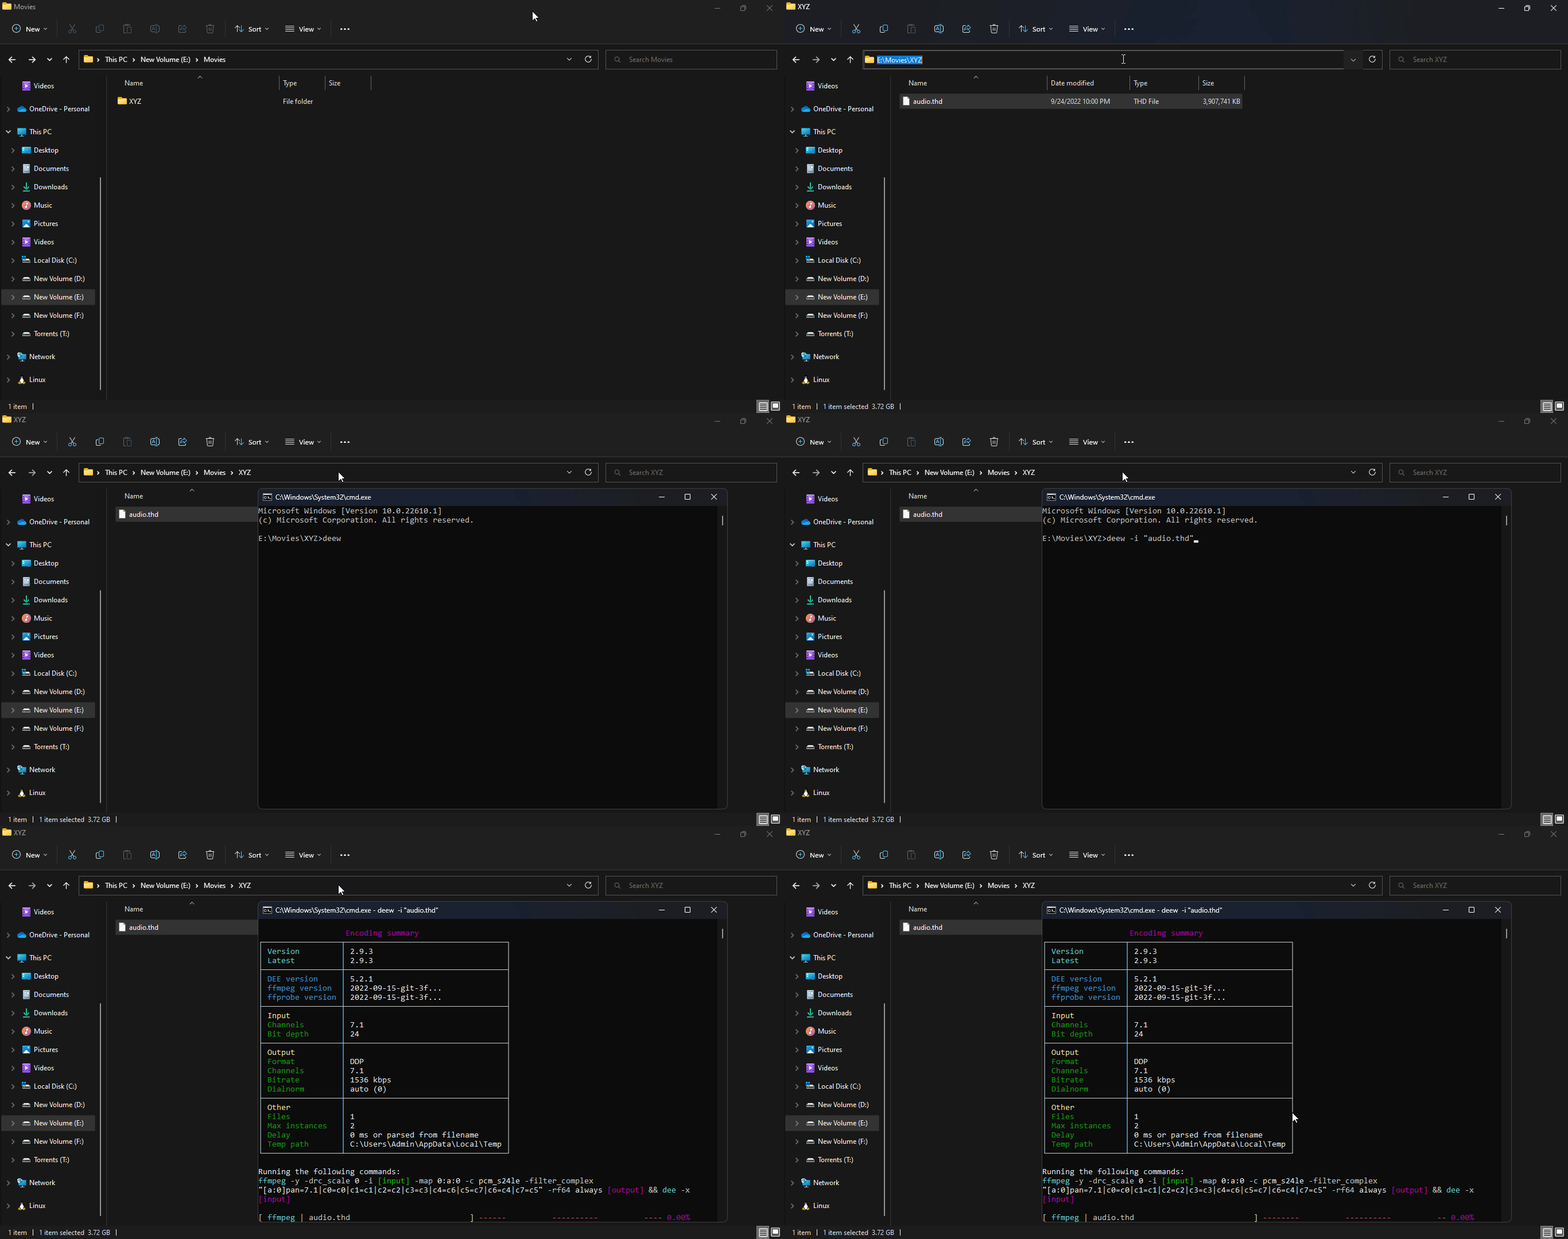
Heres an example :

In the above example 7.1 TrueHD Atmos got converted to 1536 kbps DDP7.1 .
More examples :
7.1 Source Audio to DDP5.1 wrote:
| deew -f ddp -dm 6 -i "7.1 source audio" |
7.1 Source Audio to DD5.1 wrote:
| deew -f dd -dm 6 -i "7.1 source audio" |
7.1 Source Audio to 768kbps DDP5.1 wrote:
| deew -f ddp -dm 6 -b 768 -i "7.1 source audio" |
5.1 Source Audio to 448 kbps DD5.1 wrote:
| deew -f dd -b 448 -i "5.1 source audio" |
Batch encode example :
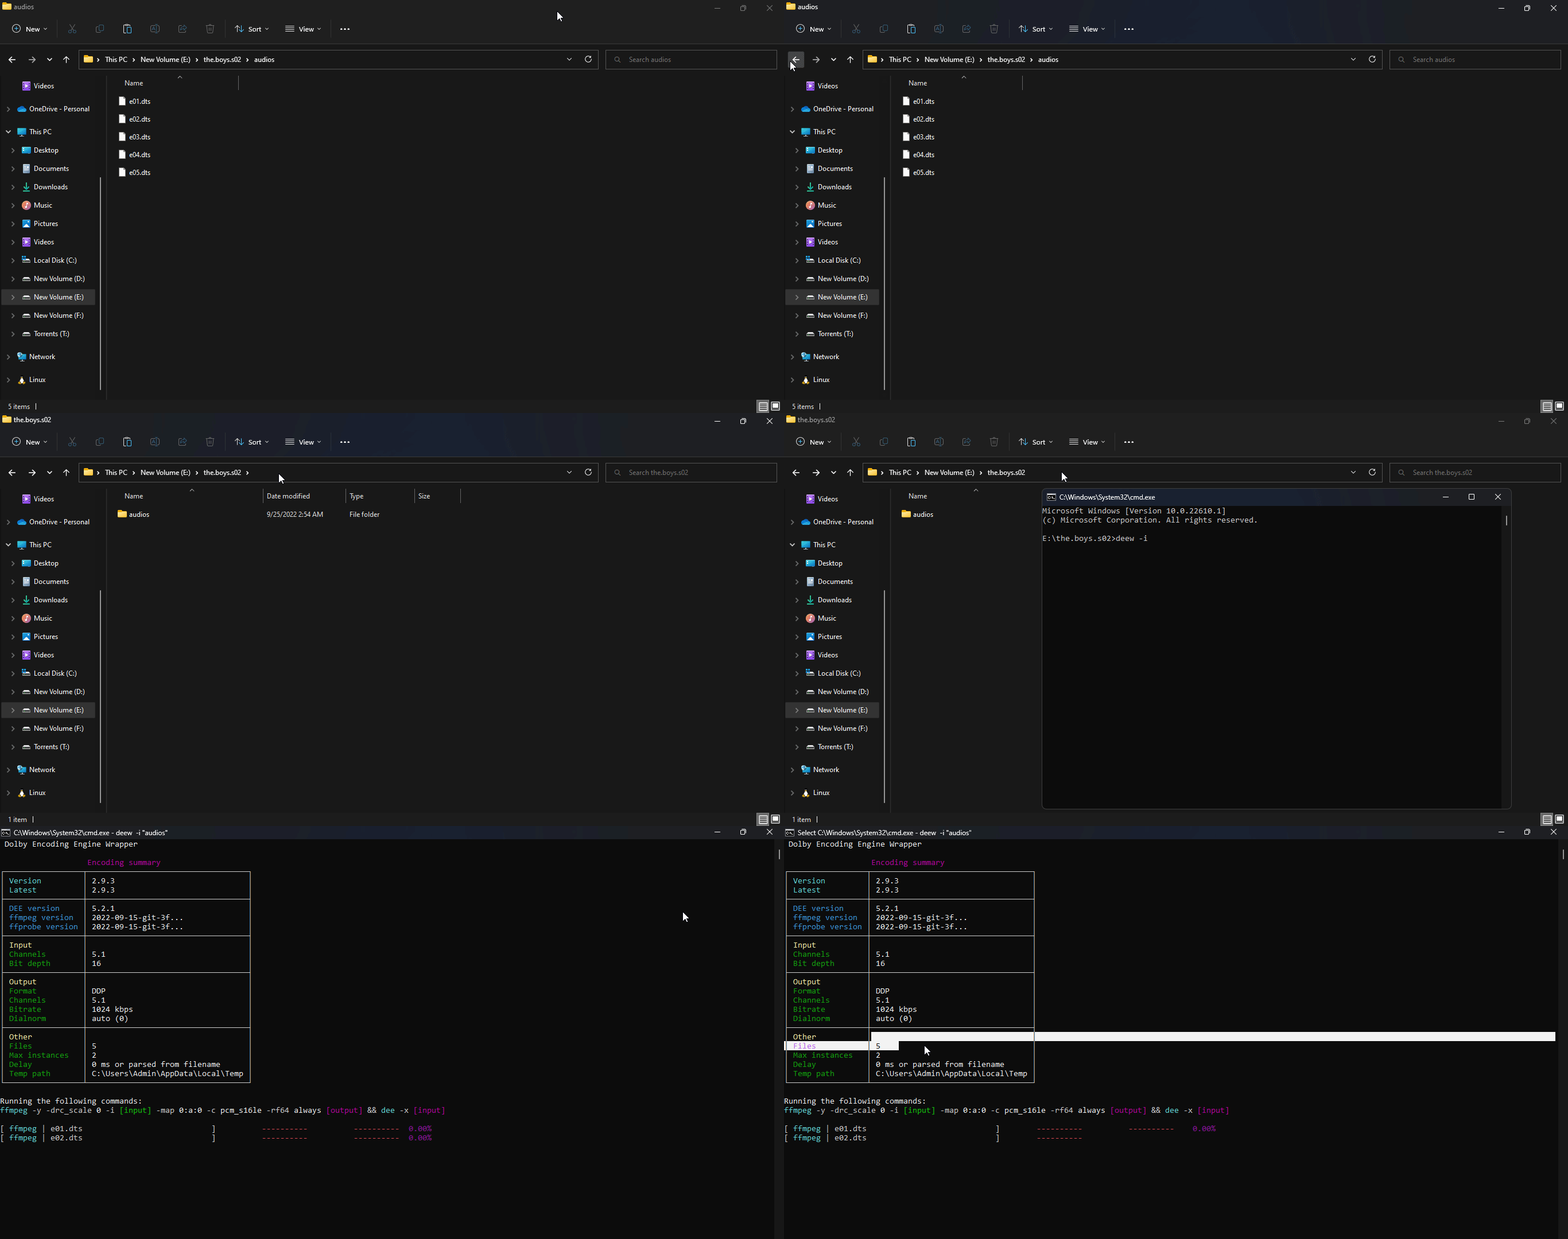
Gather all of your audios inside one folder and execute the command like this :
Quote:
| deew -i "folder location" |
Example :

Some additional notes
▣ DEEW even supports video input . In that case , the first audio track will be chosen by default .▣ You can change DEEW default settings by editing the config file . To know the location of that file , use this command : "deew -c" .
▣ After executing a DEEW command the progress will remain at 0.0% while ffmpeg parses your input audio to R64 format . So make sure you dont close the prompt thinking it's stuck .
▣ To know the supported input values for bitrates , use this command : "deew -lb"
▣ For further info go to the DEEW git page .
▣ Thanks to the author for making such a wonderful program !
▣ Please let me know if you find any misinfo on this guide .
Changelog
▣ Added vcredist requirement step . Thanks to @Tanjiro_Kamado for pointing it out . [2022-10-19]
Tags:
Windows Tips
